Section 4: OCI advanced routing
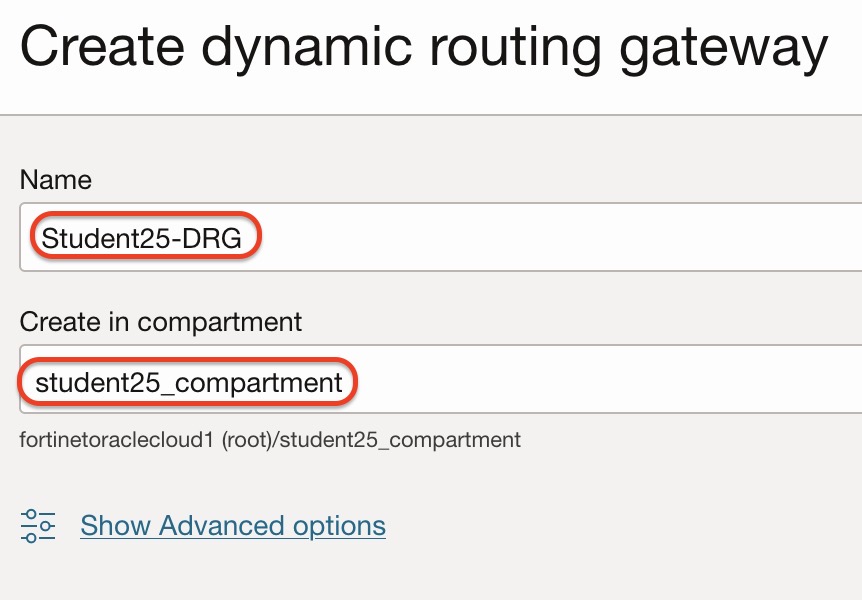
Step 4.1: Create DRG
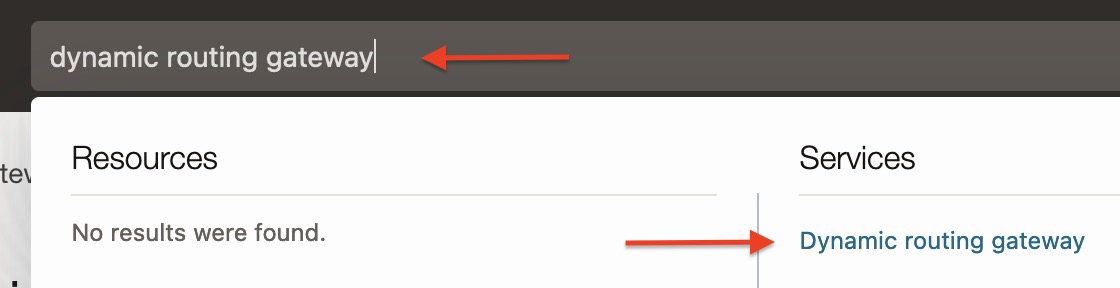
Type dynamic routing gateway to the search box on top:
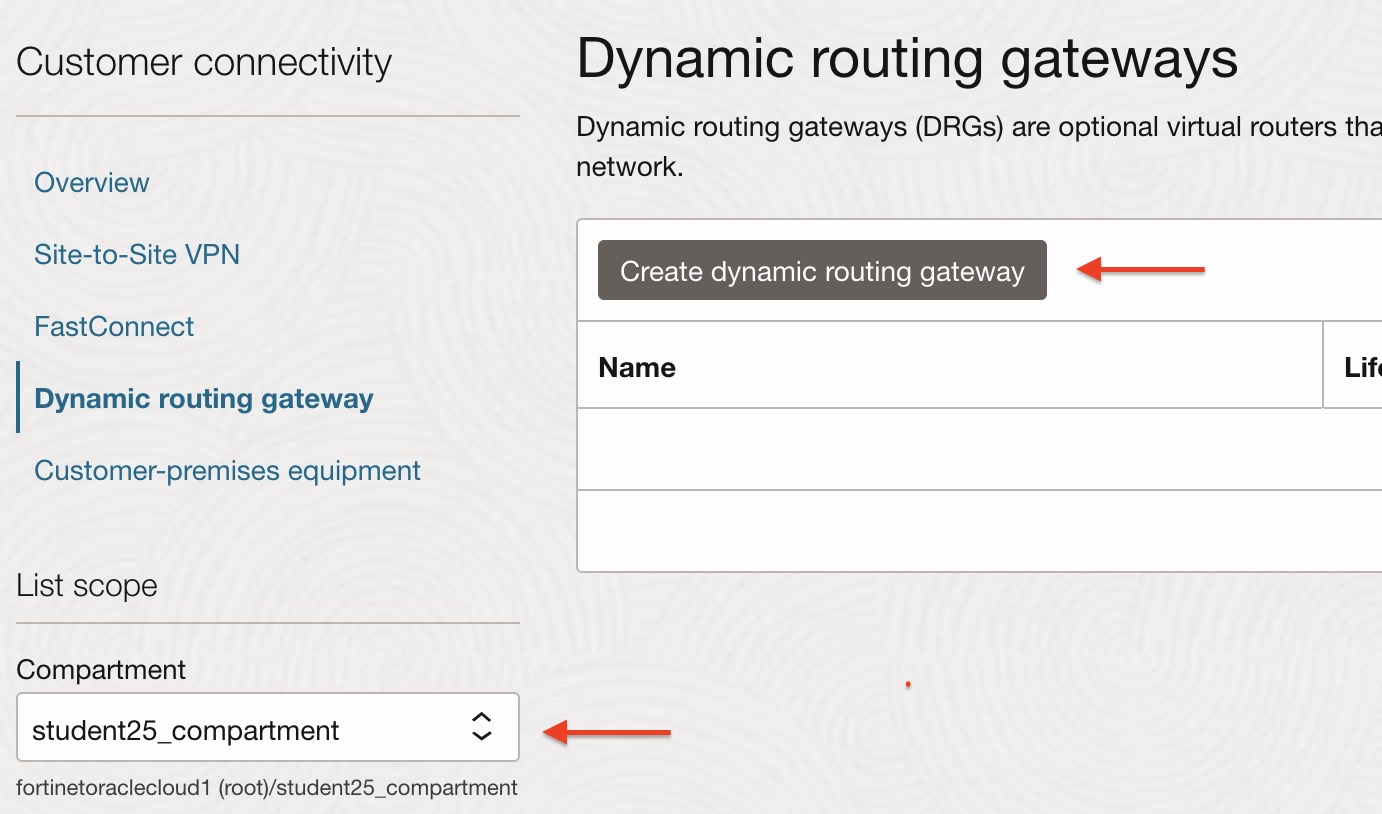
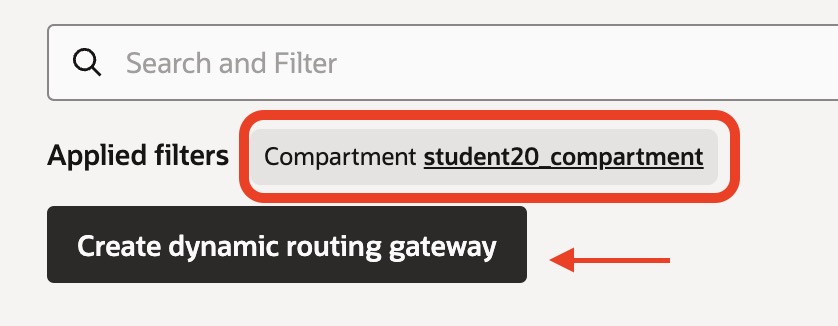
Make sure the specific compartment has been selected, then select Create dynamic routing gateway.
Set the DRG name with your group student-ID as below. Make sure the specific compartment has been selected.
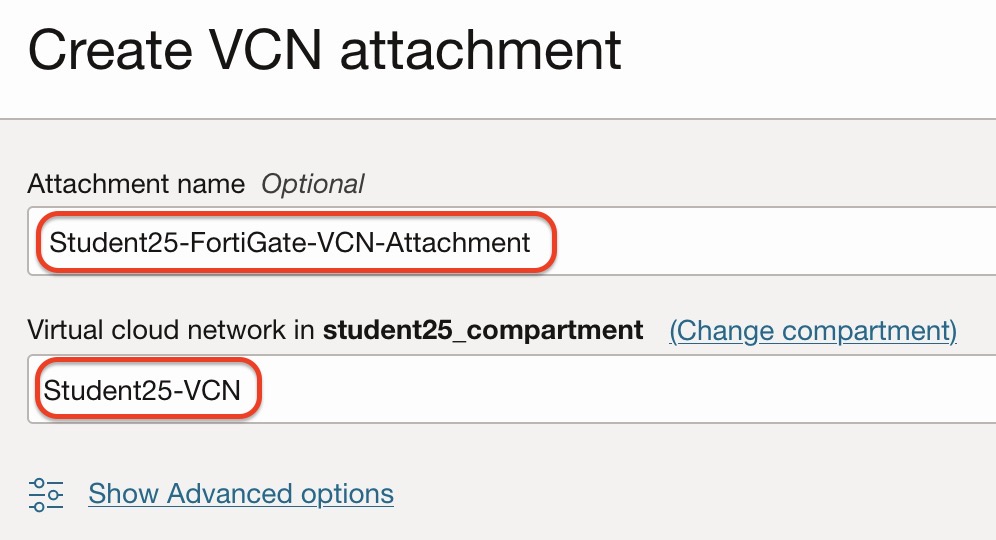
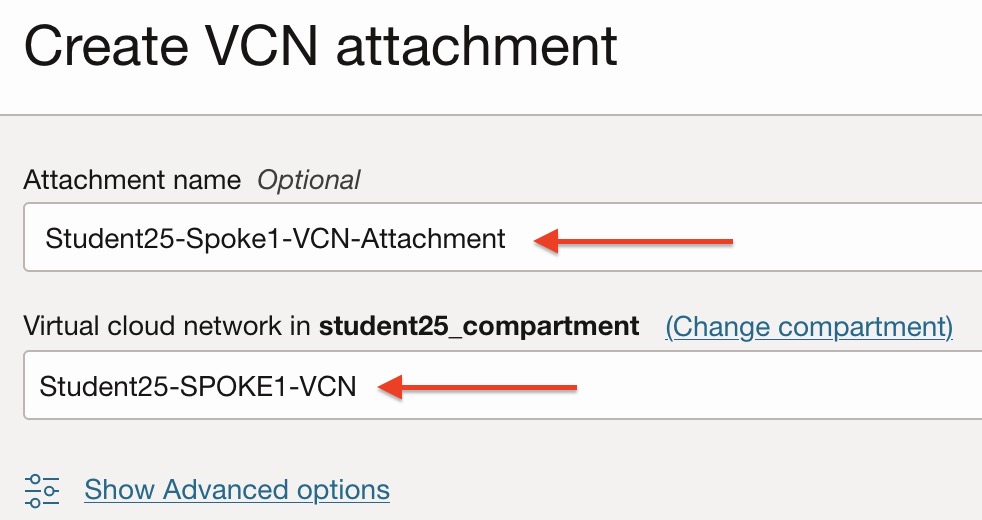
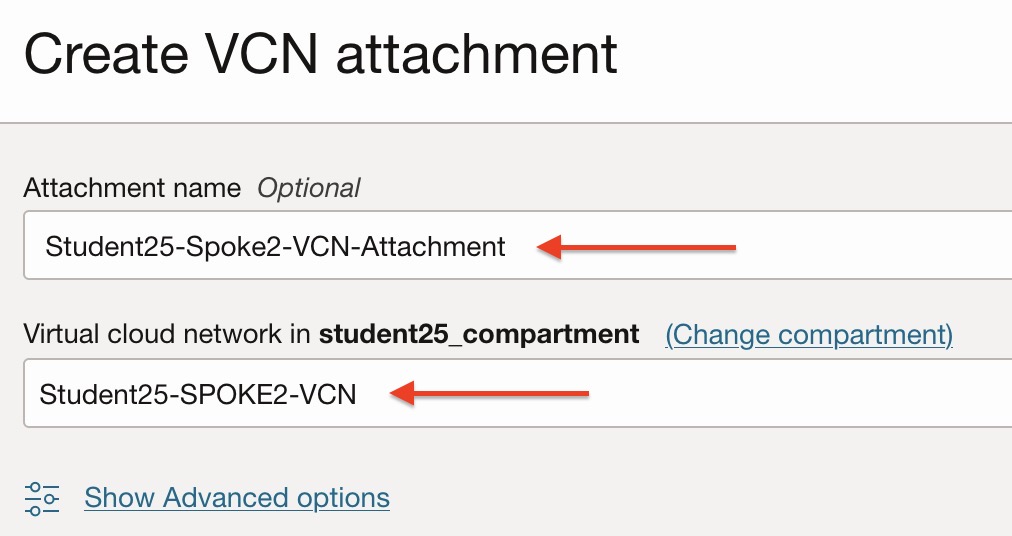
Step 4.2: DRG VCN attachments
We need to attach Spoke and FortiGate VCNs to the DRG to enable communication.
In the DRG configuration screen, select VCN attachments on the left.
Configure FortiGate-VCN attachment as below:
Configure Spoke1-VCN attachment as below:

Configure Spoke2-VCN attachment as below:
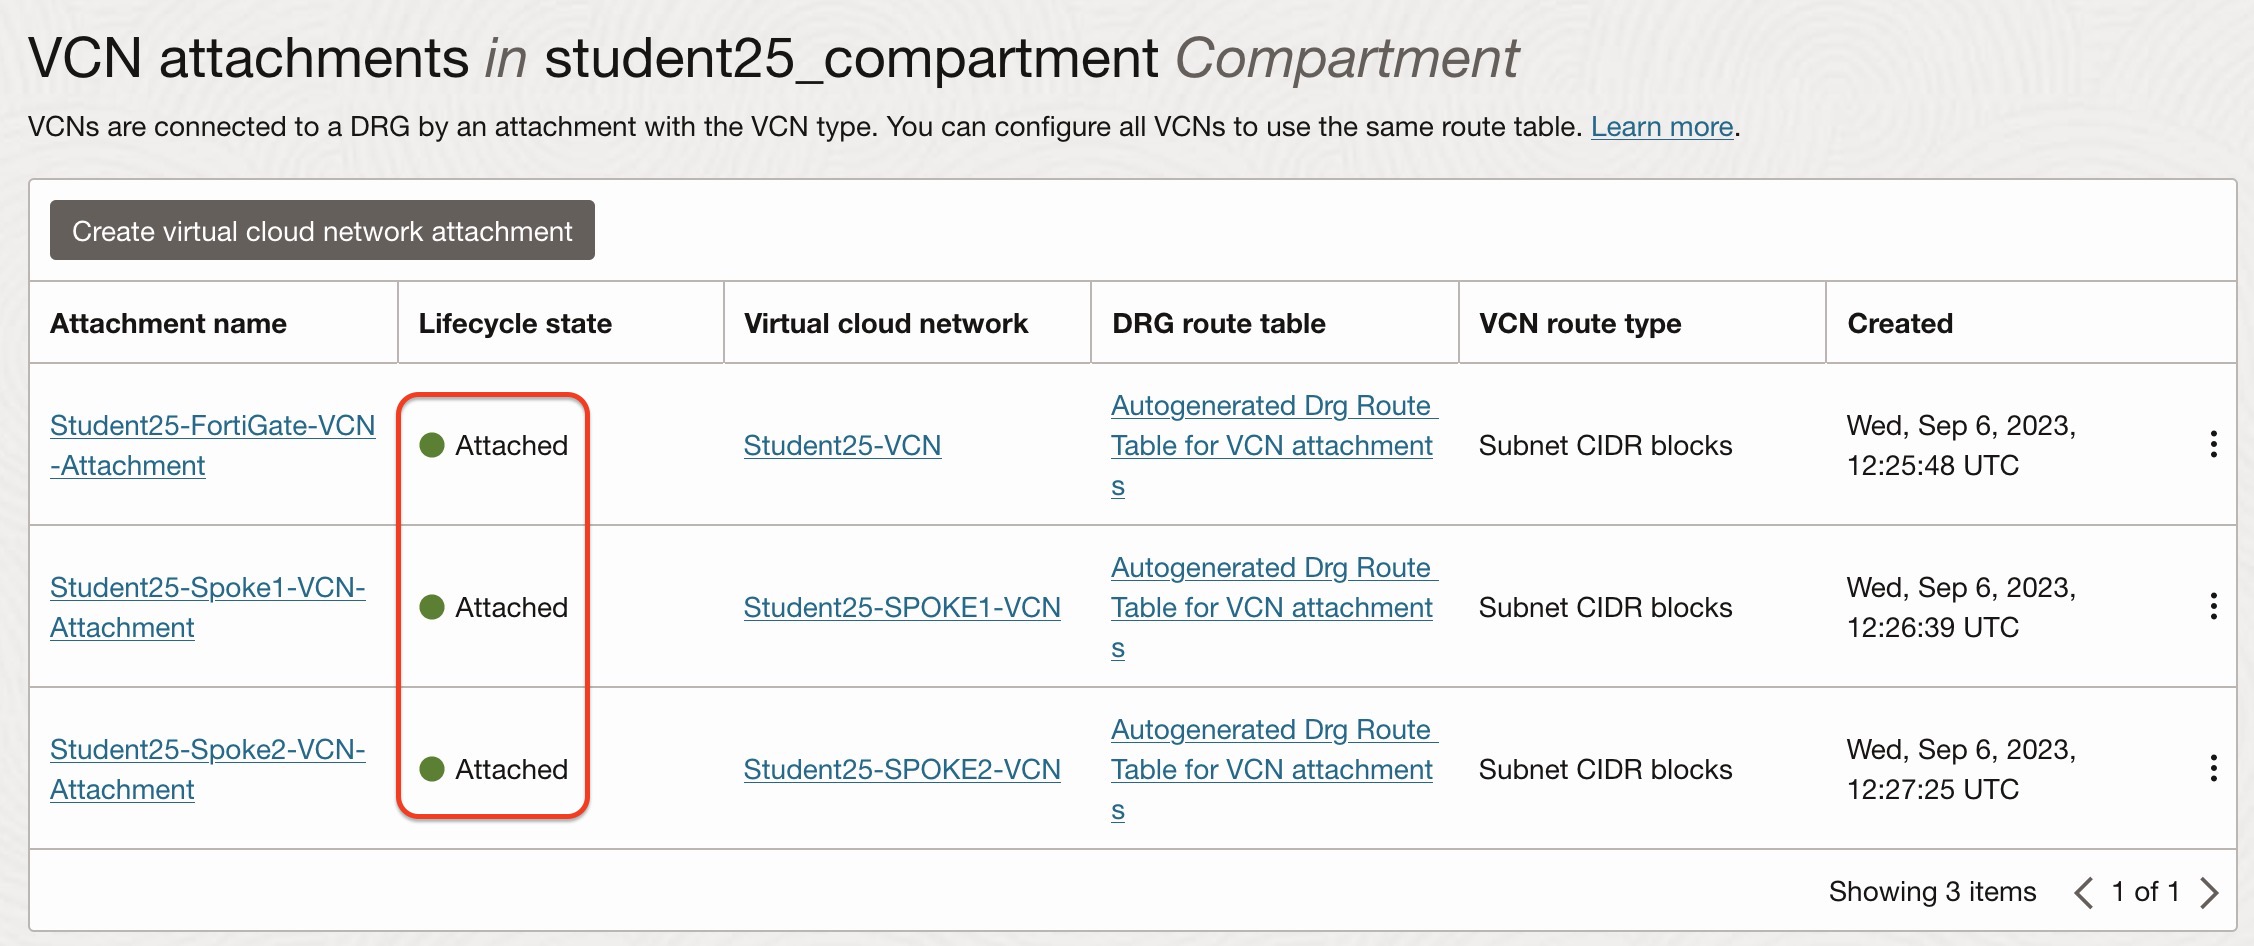
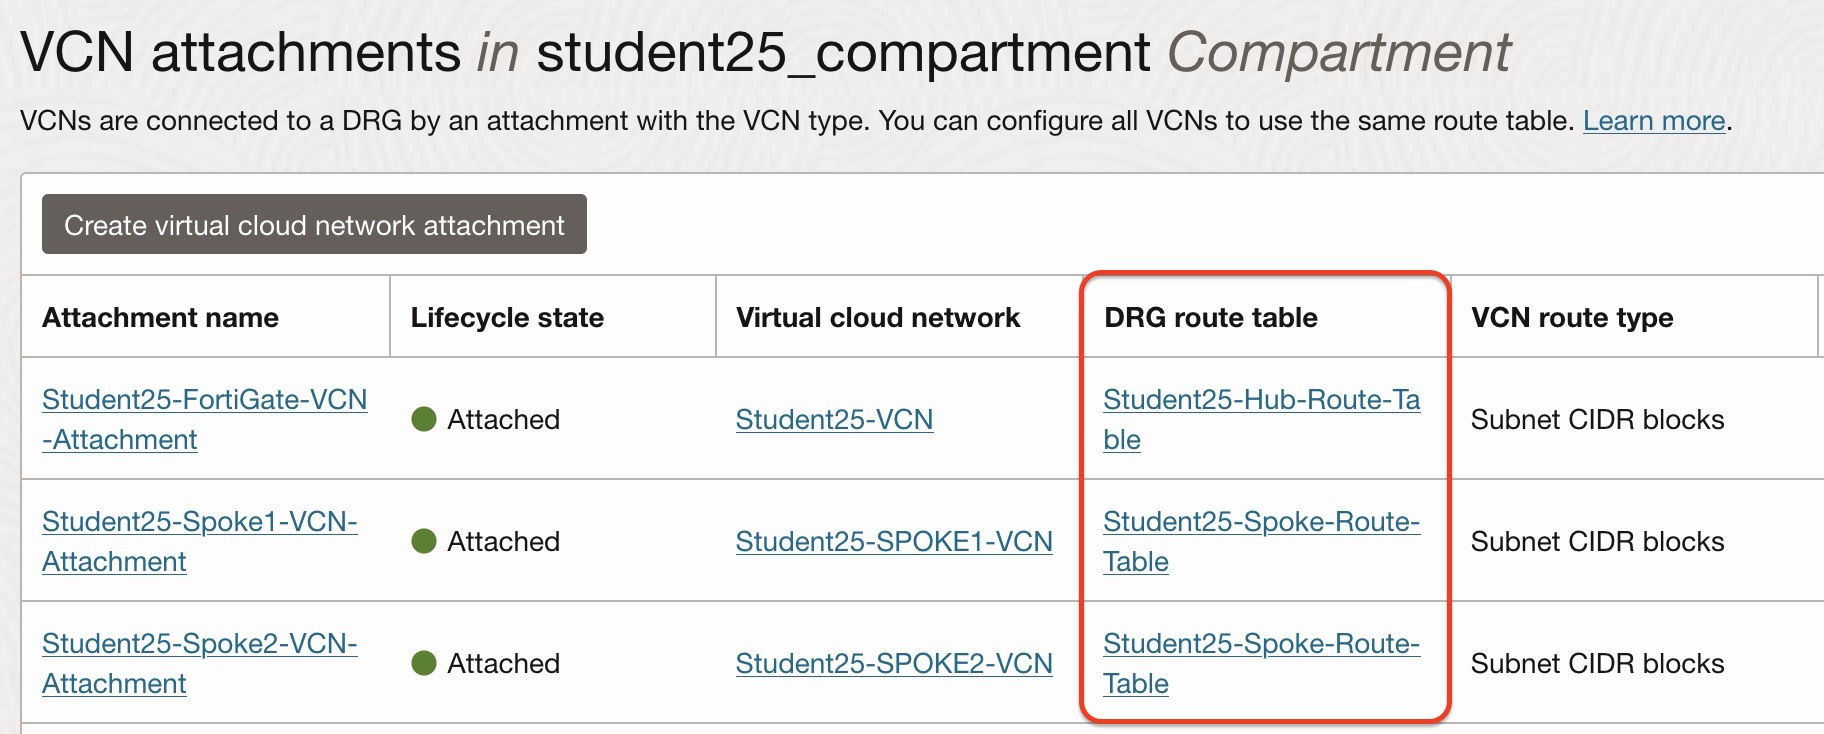
Verify that you have 3 successful attachments:
Step 4.3: Spoke subnet routing
This step is required for East-West and South-North inspection.
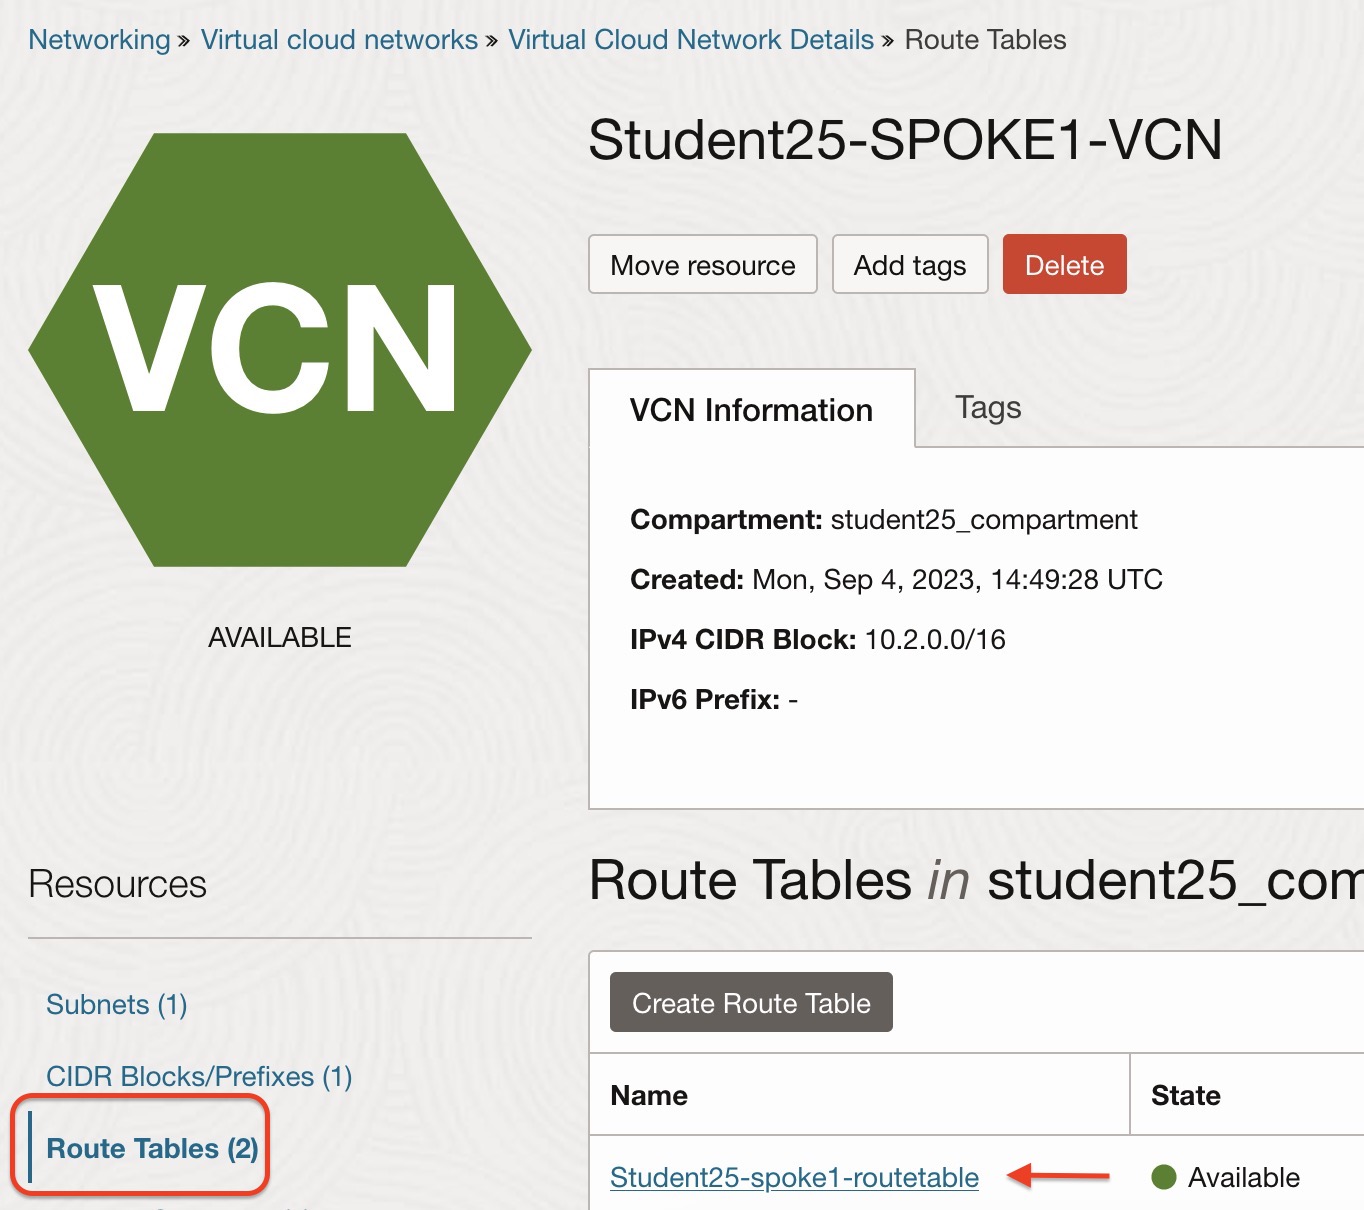
Under Virtual cloud networks > Spoke1-VCN > Routing, select Student##-spoke1-routetable.
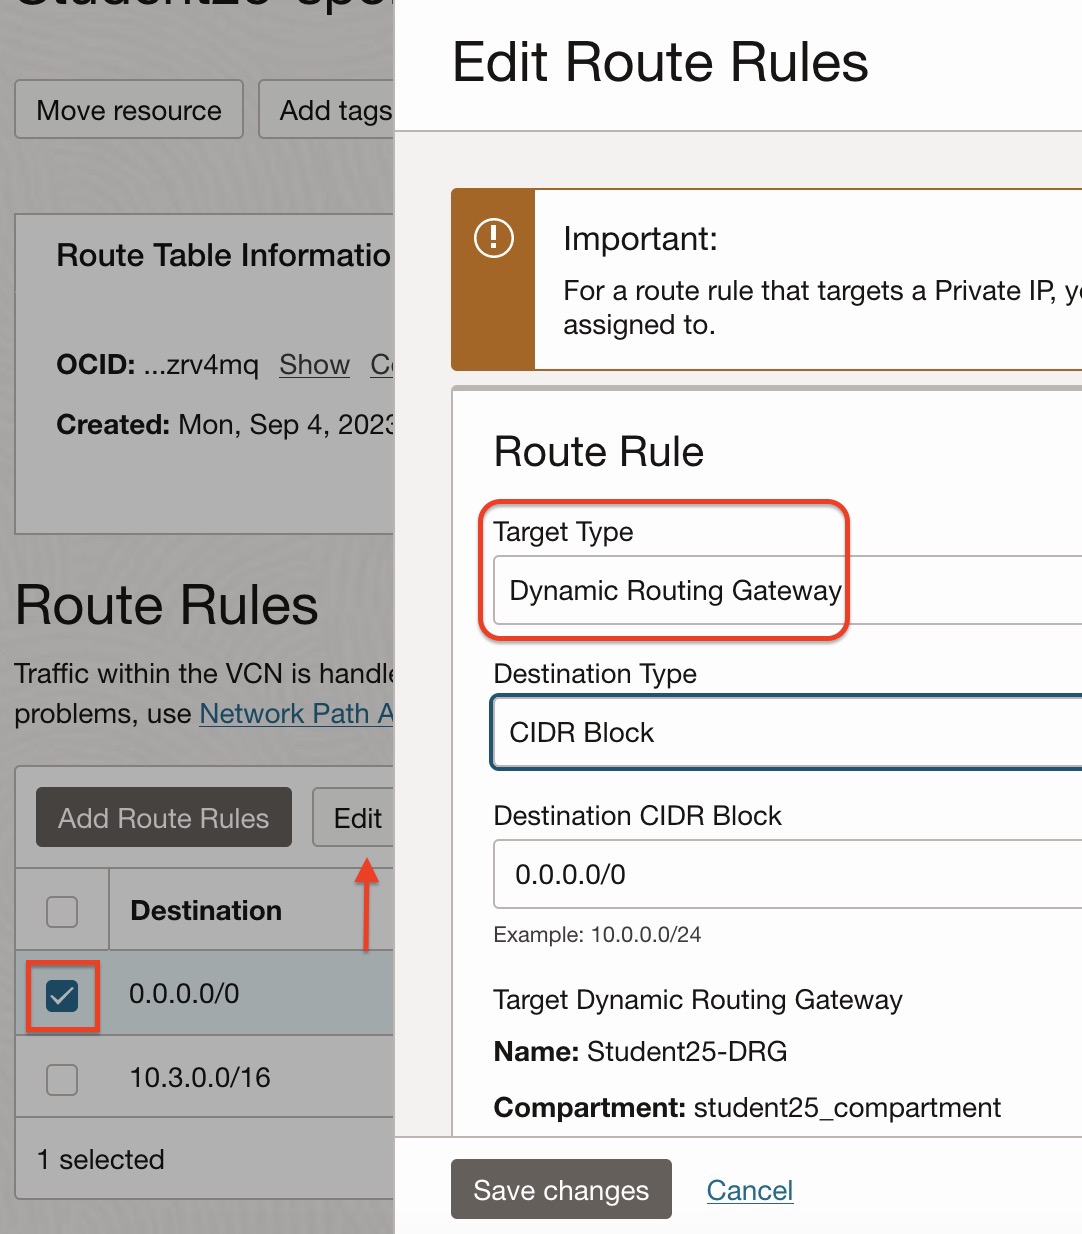
Edit the 0.0.0.0/0 route to point to the DRG.
Follow the same step to configure the Spoke2-VCN route table.
Step 4.4: FortiGate Trust subnet routing
Configure route table Student##-trust-routetable as below.
You can navigate there using this path:
Networking > Virtual cloud networks > Student##-VCN > Route tablesThis is for return traffic.
Step 4.5: DRG route tables
Create two separate route tables in the DRG management screen as below.
Navigation path:
Networking > Virtual cloud networks > Customer connectivity > Dynamic routing gateways > Student##-DRG > DRG route tables > Create DRG route table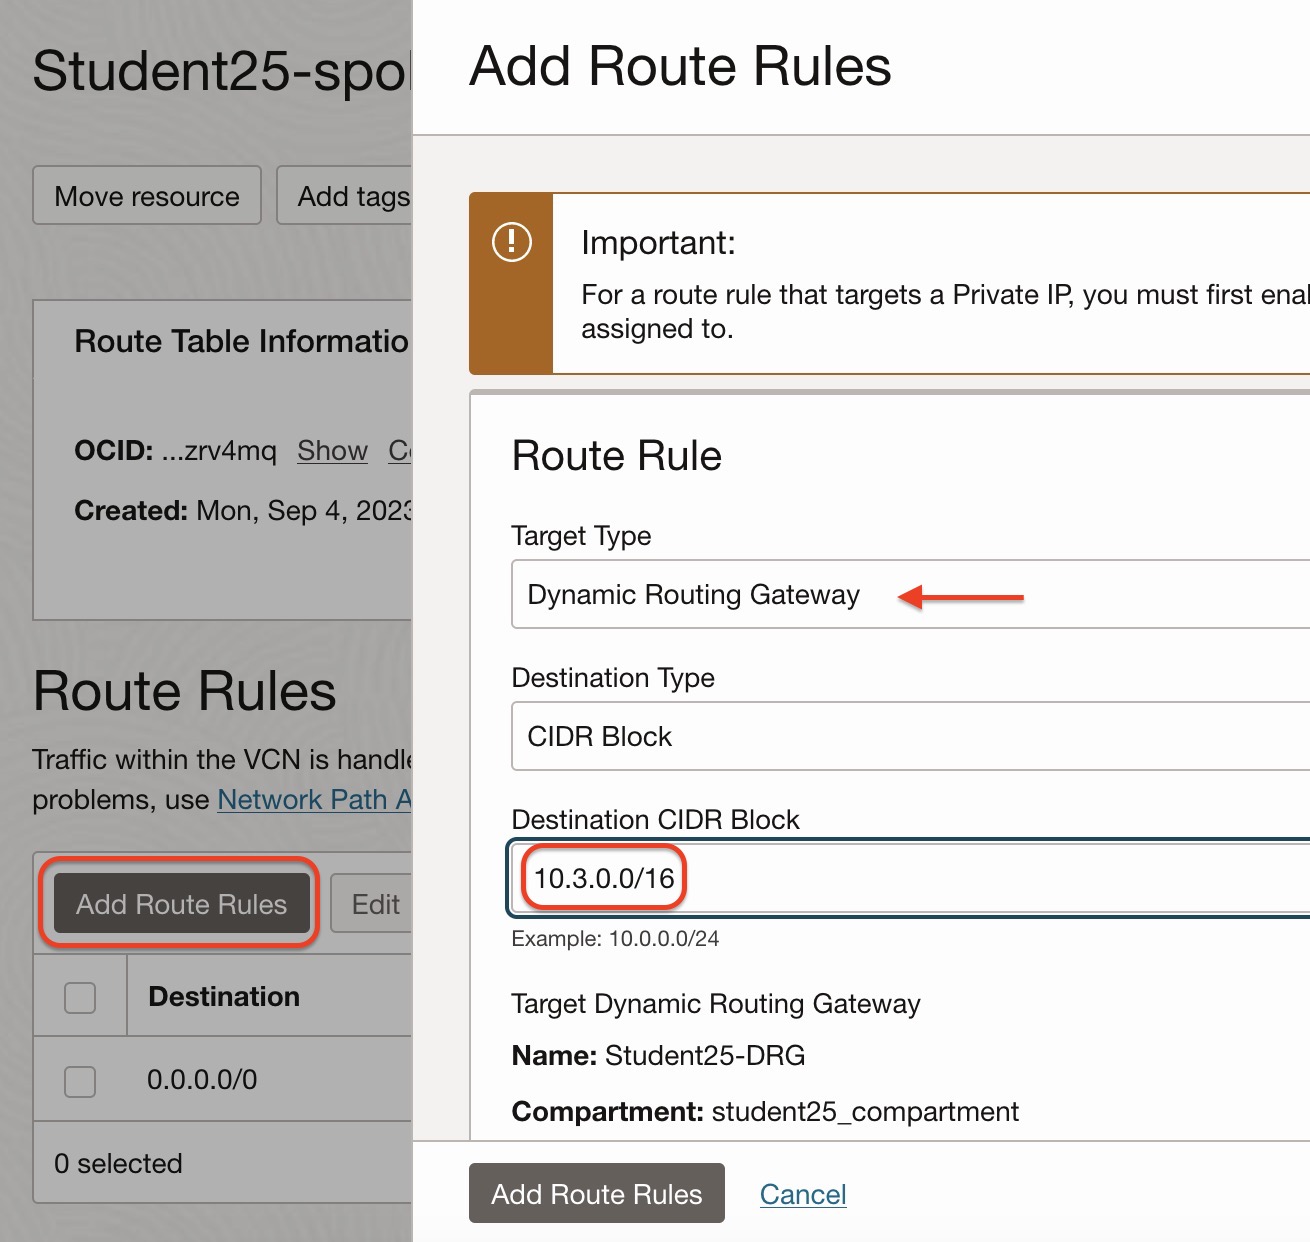
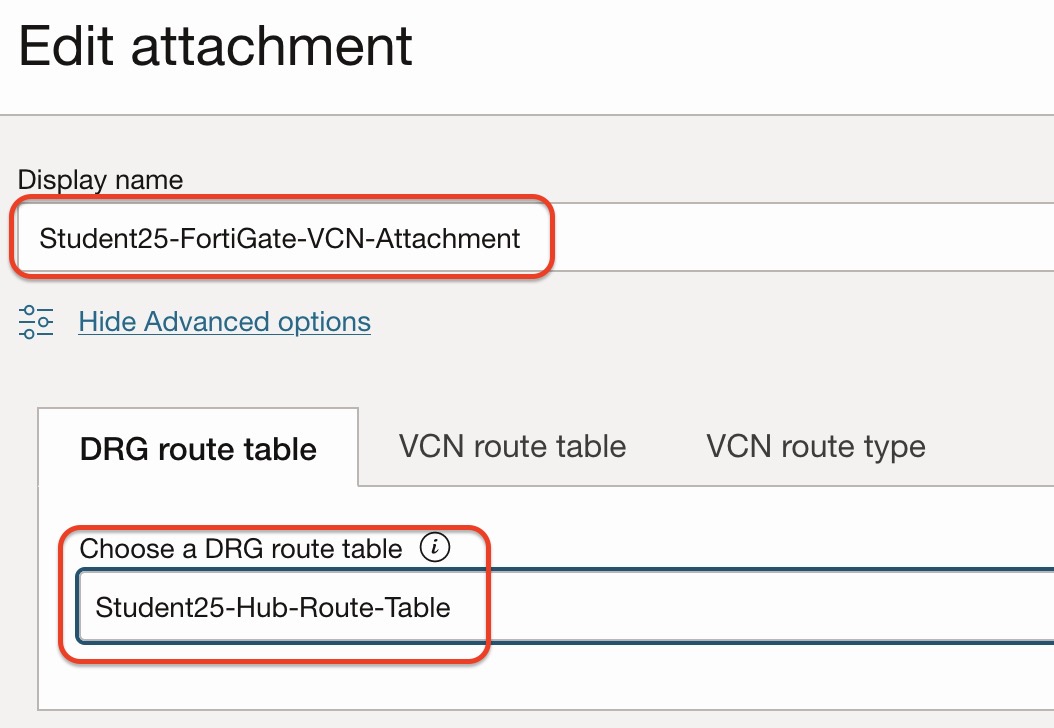
Associate DRG route tables with VCN attachments.
FortiGate VCN attachment should use Student##-Hub-Route-Table.
Spoke VCN attachments should use Student##-Spoke-Route-Table.
Navigation path:
Networking > Virtual cloud networks > Customer connectivity > Dynamic routing gateways > Student##-DRG > VCN attachments > EditFortiGate Hub VCN attachment route-table configuration:
Spoke VCN attachment route-table configuration should be configured for both Spoke-VCN attachments:
VCN attachment route-table configuration should be like this:
Step 4.6: Import route distributions
We need to create route distributions for DRG hub route tables, so required prefixes will be announced into the route table for connectivity.
First, create an import route distribution for the Hub DRG route table to allow spoke VCN CIDRs to be announced as below.
Path:
Networking > Customer connectivity > Dynamic routing gateways > Student##-DRG > Import route distributions > Create import route distribution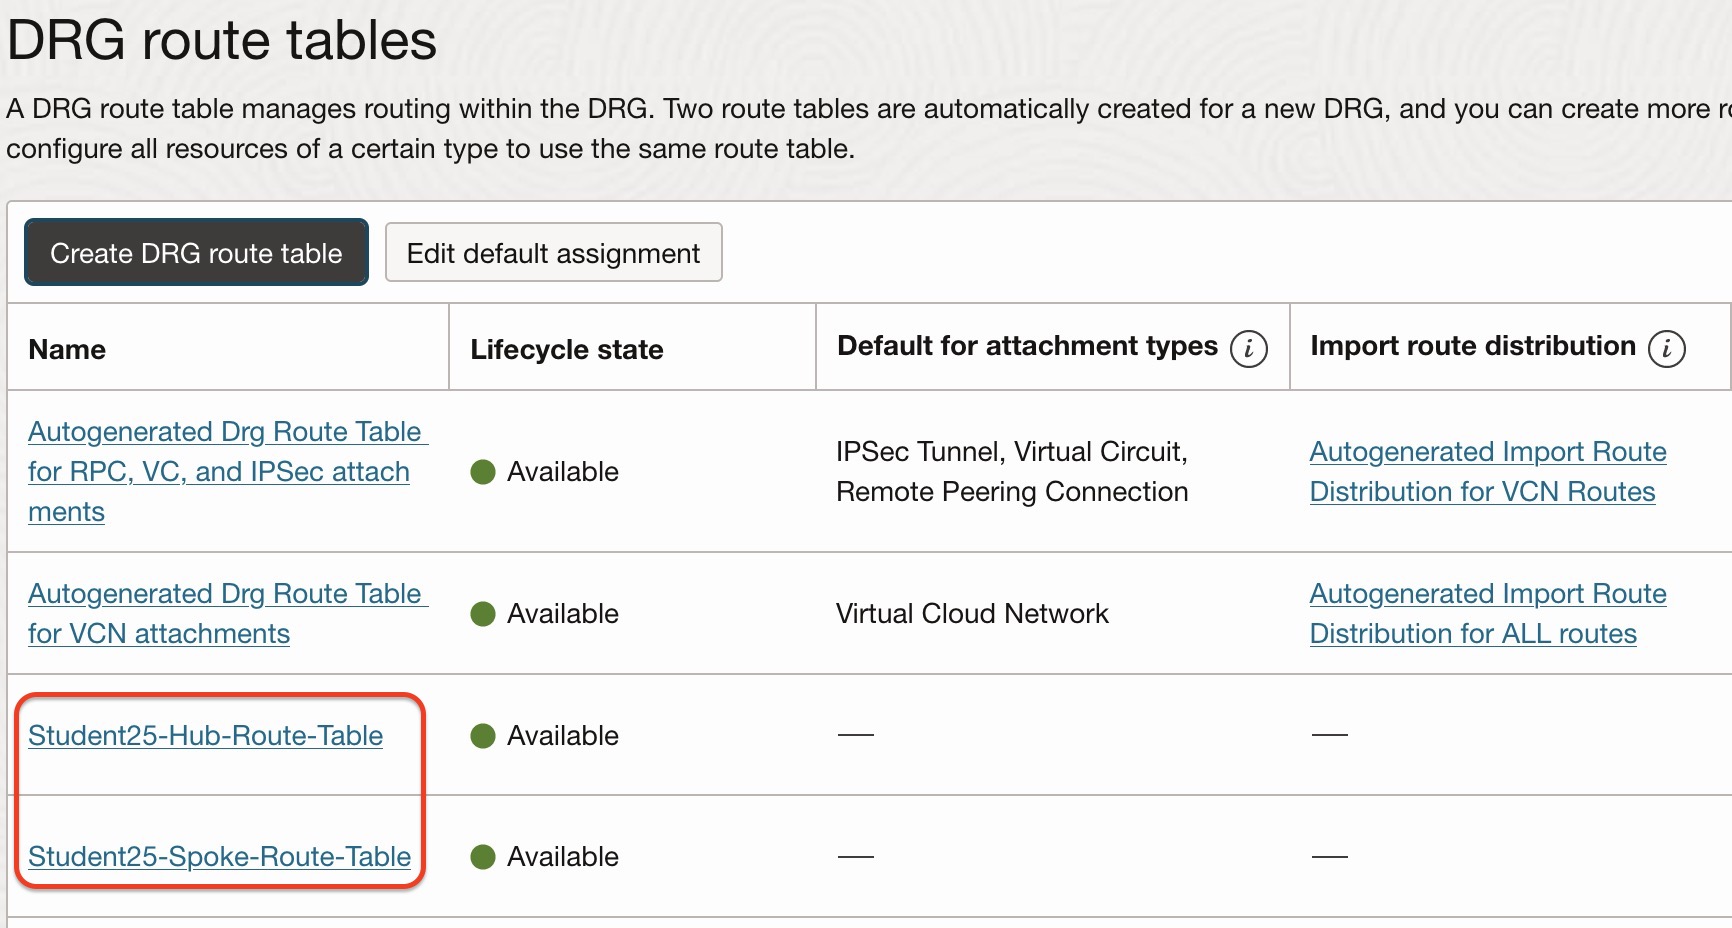
Use the import route distribution within the DRG hub route table.
Path:
Networking > Customer connectivity > Dynamic routing gateways > Student##-DRG > DRG route tables > EditHub DRG route table:
Second, create another import route distribution for the Spoke DRG route table to allow the Hub VCN CIDR to be announced as below.
Path:
Networking > Customer connectivity > Dynamic routing gateways > Student##-DRG > Import route distributions > Create import route distribution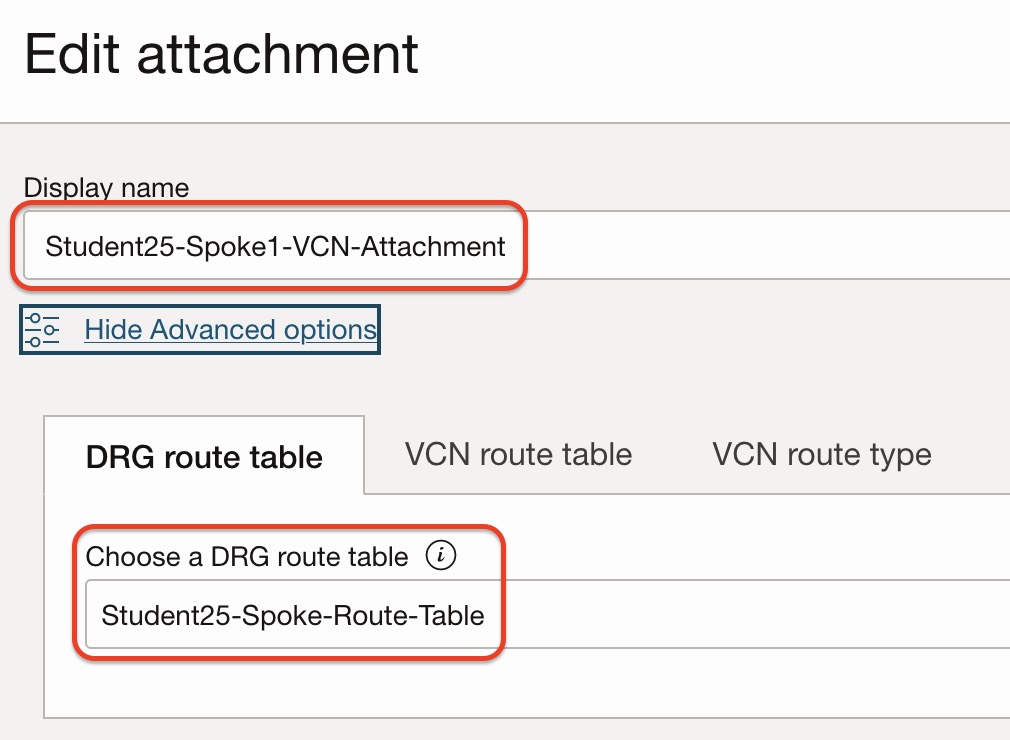
Use the import route distribution within the DRG spoke route table.
Path:
Networking > Customer connectivity > Dynamic routing gateways > Student##-DRG > DRG route tables > EditSpoke DRG route table:
Step 4.7: Hub VCN Ingress Route Table
We need to configure the FortiGate HA cluster floating IP as next-hop for handling routing by DRG.
To achieve this, first create a route table in the FortiGate Hub VCN and use that route table in Hub VCN DRG attachment ingress routing.
Create a route table in FortiGate Hub VCN as below. You can give a name using your group student-ID.
Navigation path:
Networking > Virtual Cloud Networks > Student##-VCN > Route Tables > Create Route Table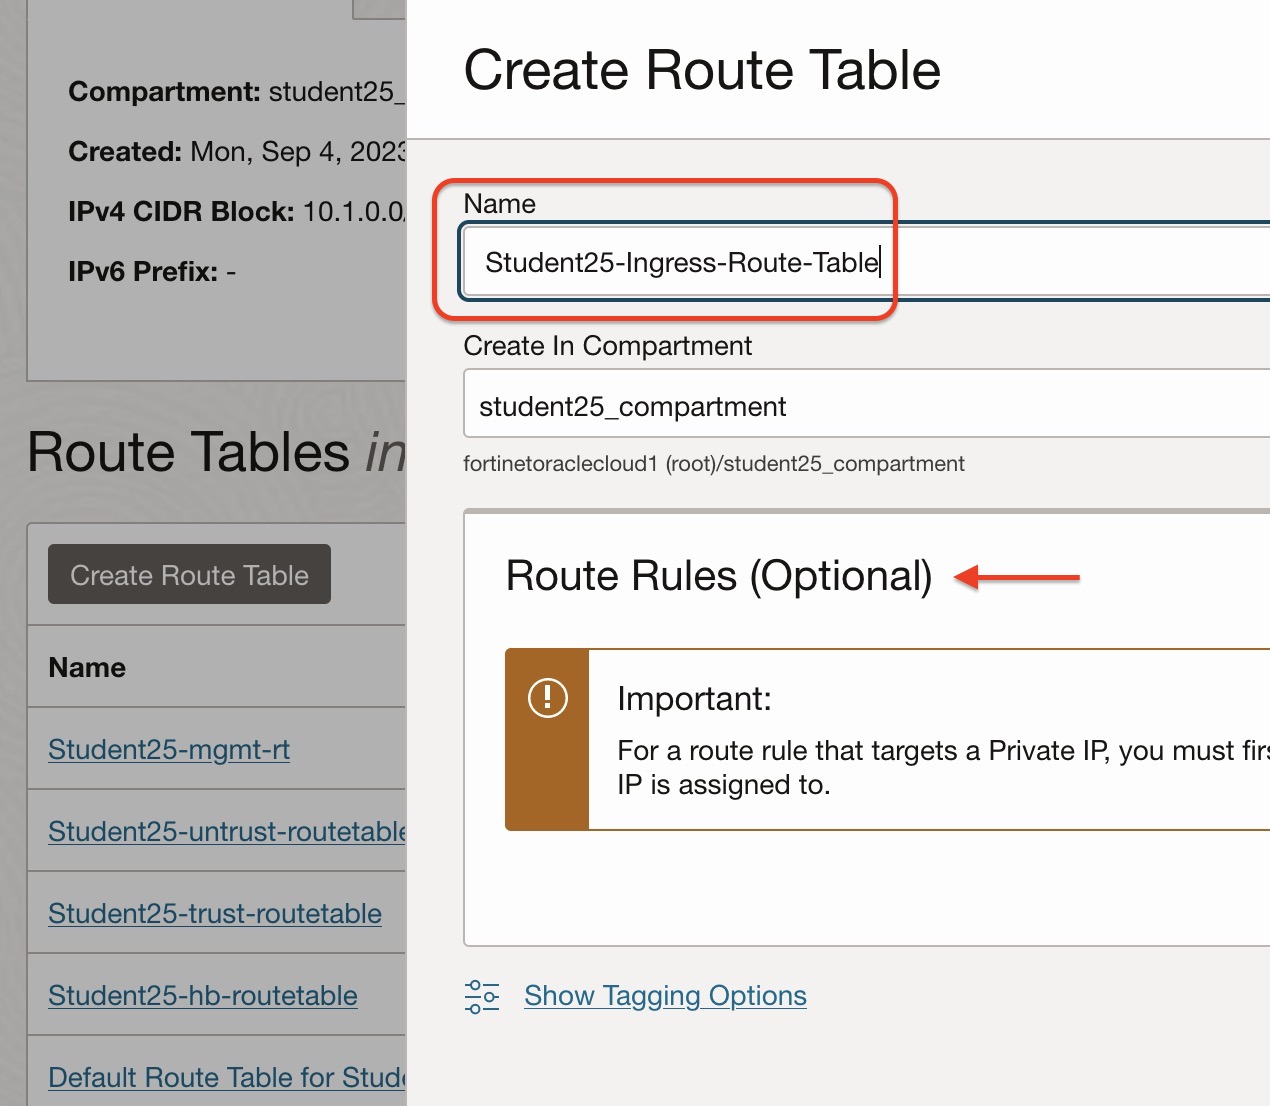
FortiGate A/P HA cluster floating IP can be found under FortiGate-VM VNIC configuration.
We will use the trust interface floating IP as the private IP target.
You can find the floating IP using this path:
Instances > Student##-FortiGate-A > Attached VNICs > Trust-a interface > IPv4 addresses > Secondary IP
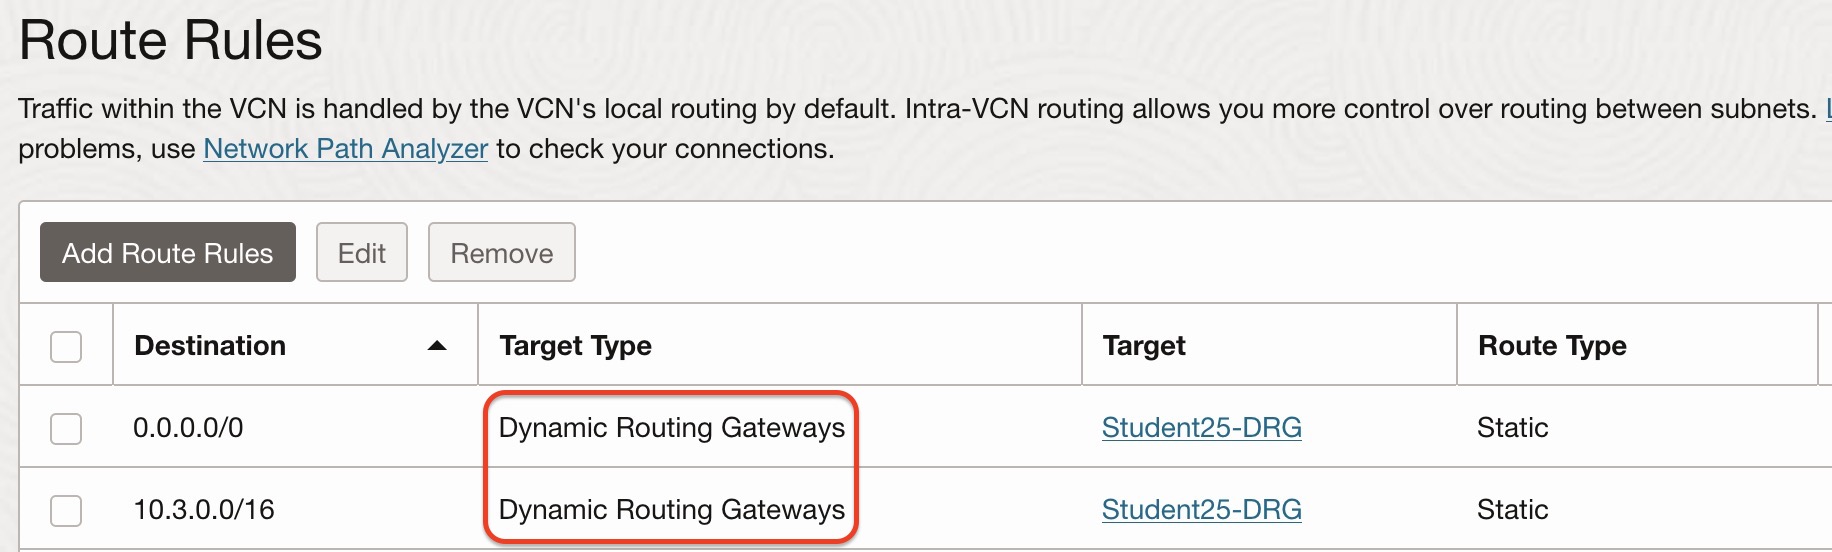
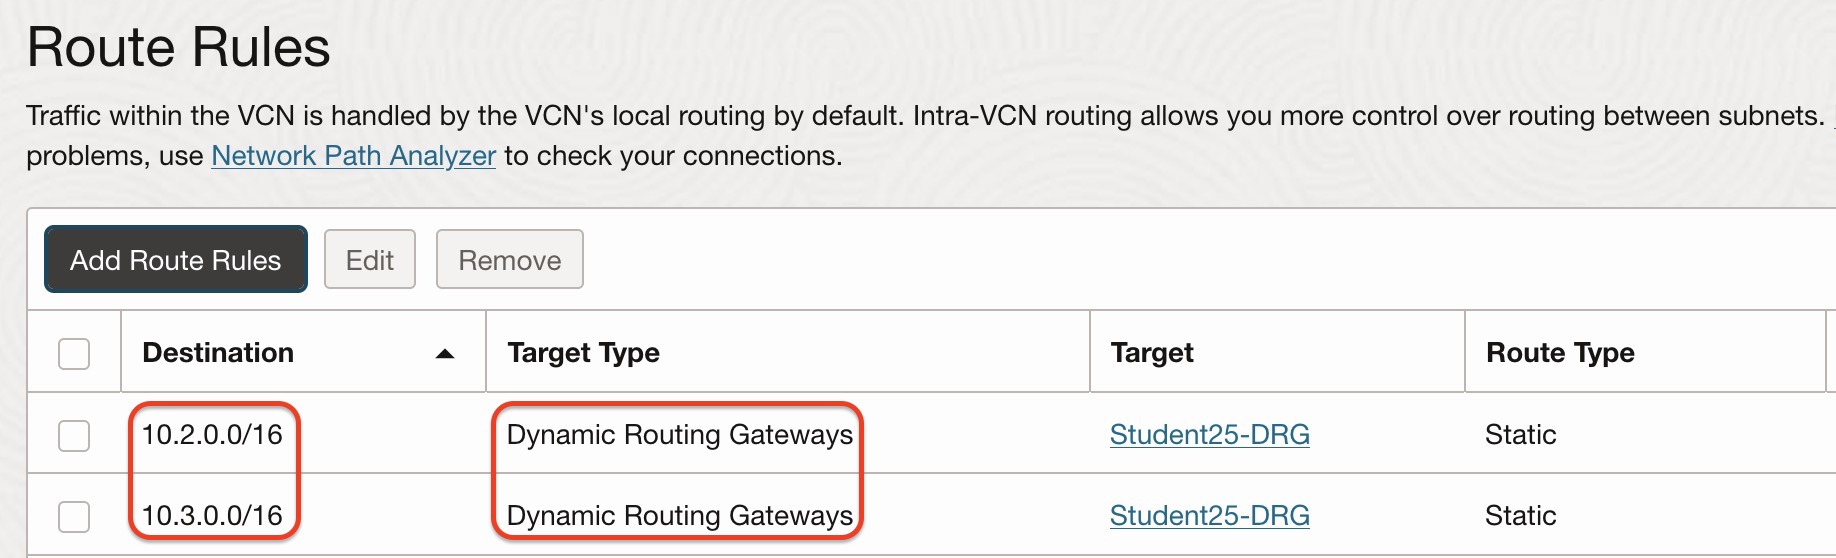
Route rules are pointing FortiGate floating IP to reach spoke VCN CIDRs and the Internet.
Navigation path:
Networking > Virtual cloud networks > Student##-VCN > Route Tables > Student##-Ingress-Route-Table > Add Route Rules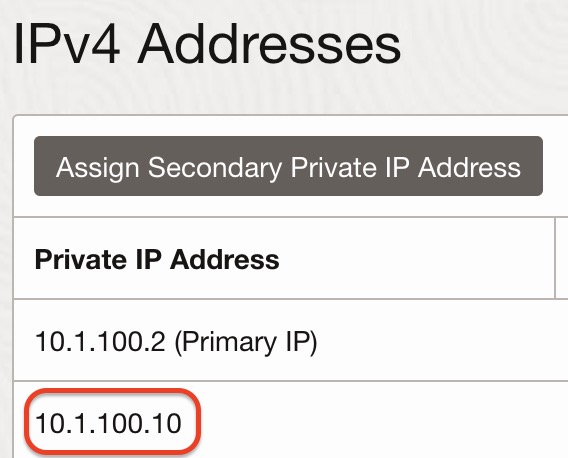
Now, we will use this route table in Hub VCN DRG attachment configuration.
Path:
Networking > Customer connectivity > Dynamic routing gateways > Student##-DRG > VCN attachments > Edit Hub VCN attachment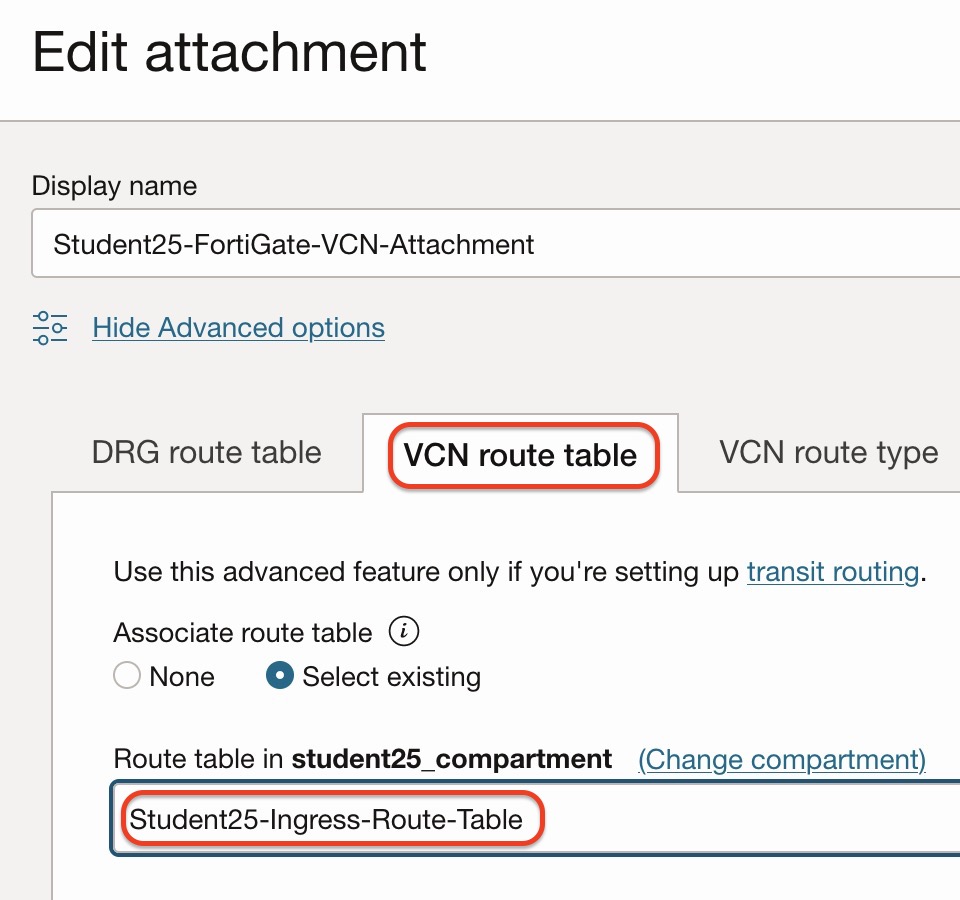
Checkpoint
Before continuing, confirm that:
- The DRG has been created.
- FortiGate VCN is attached to the DRG.
- Spoke1 VCN is attached to the DRG.
- Spoke2 VCN is attached to the DRG.
- Spoke subnet route tables point to the DRG.
- FortiGate trust subnet routing is configured.
- DRG route tables are created and associated with the correct VCN attachments.
- Import route distributions are configured.
- Hub VCN ingress route table points traffic to the FortiGate floating private IP.